
我们在上文的基础上,继续学习
条件判断:v-if、v-show
>作用:用于控制元素的显示
> 区别:
v-if:不渲染DOM,前端页面看不到标签,更节省性能(常用)
v-show:渲染DOM。将元素设置为display:none
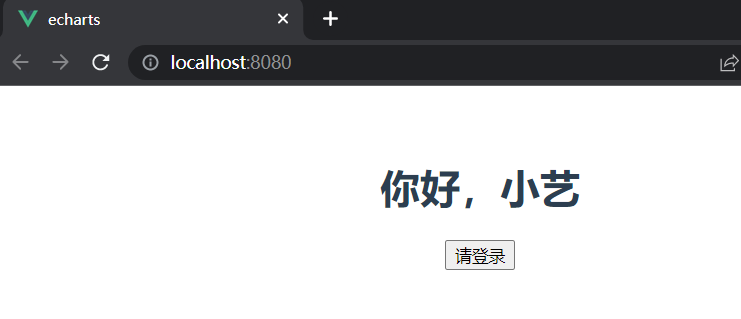
我们看如下代码,将他们都取值为true时,表示显示
<template>
  <div id="app">
    <h1 v-if="true">你好,小艺</h1>
    <button v-show="true">请登录</button>
  </div>
</template>
我们将取值设置为false就能看到他们的区别
<template>
  <div id="app">
    <h1 v-if="false">你好,小艺</h1>
    <button v-show="false">请登录</button>
  </div>
</template>
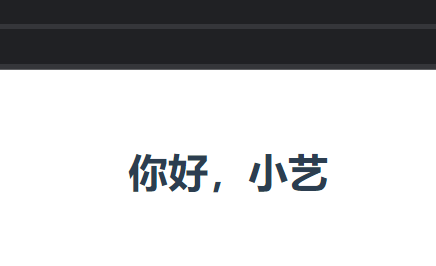
可以看到 v-if的元素,标签已经不在了,而v-show只改变了元素的css样式

该语法一般我们用于登录、注销按钮的显示判断
如:登录后显示用户名,没登录显示登录按钮
<template>
  <div id="app">
    <h1 v-if="isLogin">你好,小艺</h1>
    <button v-if="!isLogin">请登录</button>
  </div>
</template>

<script>
export default {
  data() {
    return{
      isLogin:true
    }
  }
}
</script>
呈现的页面:
显示列表(v-for)
>格式:<li v-for="(item,index) of array" :key="index" >
key属性的作用:确保列表的唯一性,将index值绑定要key属性上
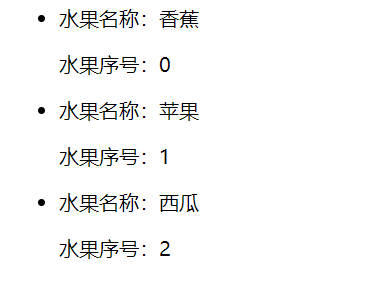
如我们data中有一个数组变量
fruits:["香蕉","苹果","西瓜"]
我们想遍历到页面中显示,就要将v-for放在要重复的标签中
<template>
  <div id="app">
    <ul>
      <li v-for="(fruit,index) of fruits" :key="index">
        <p>水果名称:{{fruit}}</p>
        <p>水果序号:{{index}}</p>
      </li>
    </ul>
  </div>
</template>

<script>
export default {
  data() {
    return{
      fruits:["香蕉","苹果","西瓜"]
    }
  }
}
</script>
呈现效果:
我们实际开发中,显示的数据可能复杂一些,我们以学生信息表格为例,显示在一个table标签中:
我们需要重复的是每一行,所以就在行内v-for,在具体的单元格里面显示遍历的项目
<template>
  <div id="app">
    <table>
      <thead>
        <th>序号</th>
        <th>姓名</th>
        <th>年龄</th>
      </thead>
      <tbody>
        <tr v-for="(item,index) of student" :key="index">
          <td>{{ index + 1 }}</td>
          <td>{{ item.name }}</td>
          <td>{{ item.age }}</td>
        </tr>
      </tbody>
    </table>
  </div>
</template>

<script>
export default {
  data() {
    return{
      student:[
        {name:"小曹",age:17},
        {name:"小曾",age:18},
        {name:"小力",age:19}
      ]
    }
  }
}
</script>
显示效果:

组件嵌套
当前,我们都是写在App.vue这个组件中。实际开发大型项目时,都是多页面的,有许许多多的组件。
我们一般将自定义的组件都写在 “components” 里面

>组件命名规则
大写字母,驼峰命名
小写开头,并且全是小写可能会和本来的html标签产生冲突
>引入外部组件
例如我们想将“components”中的组件引入到 “app.vue”中
- 首先我们已经在components中创建好了自定义组件(最好使用多个单词,不然会报错)
- 在app.vue中引入组件,并注册组件
- 在script标签中引入:
import hello from "./components/HelloComp.Vue"- 然后在export default中注册:
components : { HelloComp:HelloComp }- 在ES6中,属性名和属性值相同时,可以只写一个单词,
即components : { HelloComp }
- 引入并注入完成后,我们直接在上面的template标签中使用
<HelloComp></HelloComp> - 由于驼峰命名法的规则,其实我们可以使用-分隔,也可以不区分大小写,以下都可以
<Hello-Comp></Hello-Comp>
<hello-comp></hello-comp>
下面演示一段完整代码:
HelloComp.vue (自定义组件)
<template>
  <div>
    <h1>I am hello components</h1>
  </div>
</template>
<script>
export default {
  data() {
  }
}
</script>
<style>
</style>
App.vue
<template>
  <div id="app">
   <hello-comp></hello-comp>
  </div>
</template>
<script>
import HelloComp from "@/components/HelloComp.vue"
export default {
  components:{
  HelloComp
  },
}
<style>
</style>
展示效果:

下一文,我们讲组件传值(同级组件、父子组件)
声明:本站所有文章,如无特殊说明或标注,均为本站原创发布。任何个人或组织,在未征得本站同意时,禁止复制、盗用、采集、发布本站内容到任何网站、书籍等各类媒体平台。如若本站内容侵犯了原著者的合法权益,可联系我们进行处理。