
依赖
<dependency>
      <groupId>org.apache.httpcomponents</groupId>
      <artifactId>httpmime</artifactId>
      <version>4.5.2</version>
    </dependency>

    <!-- https://mvnrepository.com/artifact/org.apache.poi/poi -->
    <dependency>
      <groupId>org.apache.poi</groupId>
      <artifactId>poi</artifactId>
      <version>3.14</version>
    </dependency>
调用
public static void main(String[] args) throws ClientProtocolException, URISyntaxException, IOException {
    String s =

    writeWordFile("d:/", "ab.doc", getHttpData(s));
    System.out.println("ok");
  }
获取网页
// 请求网路自考网数据
  public static String getHttpData(String url) throws URISyntaxException, ClientProtocolException, IOException {
    List<NameValuePair> nameValuePairList = Lists.newArrayList();
    nameValuePairList.add(new BasicNameValuePair("q", "x"));
    URI uri = new URIBuilder(url).addParameters(nameValuePairList).build();
    List<Header> headerList = Lists.newArrayList();
    headerList.add(new BasicHeader(HttpHeaders.ACCEPT_ENCODING, "gzip, deflate"));
    headerList.add(new BasicHeader(HttpHeaders.CONNECTION, "keep-alive"));
    HttpClient httpClient = HttpClients.custom().setDefaultHeaders(headerList).build();
    HttpUriRequest httpUriRequest = RequestBuilder.get().setUri(uri).build();
    HttpResponse httpResponse = httpClient.execute(httpUriRequest);
    HttpEntity entity = httpResponse.getEntity();
    String rawHTMLContent = EntityUtils.toString(entity);
    EntityUtils.consume(entity);
    return rawHTMLContent;
  }
写入本地
public static void writeWordFile(String path, String fileName, String content) {
    try {
      if (!"".equals(path)) {
        // 检查目录是否存在
        File fileDir = new File(path);
        if (fileDir.exists()) {
          byte b[] = content.getBytes();
          ByteArrayInputStream bais = new ByteArrayInputStream(b);
          POIFSFileSystem poifs = new POIFSFileSystem();
          DirectoryEntry directory = poifs.getRoot();
          DocumentEntry documentEntry = directory.createDocument("WordDocument", bais);
          FileOutputStream ostream = new FileOutputStream(path + fileName);
          poifs.writeFilesystem(ostream);
          bais.close();
          ostream.close();
        }
      }
    } catch (IOException e) {
      e.printStackTrace();
    }
  }
import
import java.io.ByteArrayInputStream;
import java.io.File;
import java.io.FileOutputStream;
import java.io.IOException;
import java.net.URI;
import java.net.URISyntaxException;
import java.util.Iterator;
import java.util.List;
import java.util.Map;
import java.util.Set;

import javax.servlet.http.HttpServletRequest;

import org.apache.http.Header;
import org.apache.http.HttpEntity;
import org.apache.http.HttpHeaders;
import org.apache.http.HttpResponse;
import org.apache.http.NameValuePair;
import org.apache.http.client.ClientProtocolException;
import org.apache.http.client.HttpClient;
import org.apache.http.client.methods.HttpUriRequest;
import org.apache.http.client.methods.RequestBuilder;
import org.apache.http.client.utils.URIBuilder;
import org.apache.http.impl.client.HttpClients;
import org.apache.http.message.BasicHeader;
import org.apache.http.message.BasicNameValuePair;
import org.apache.http.util.EntityUtils;
import org.apache.poi.poifs.filesystem.DirectoryEntry;
import org.apache.poi.poifs.filesystem.DocumentEntry;
import org.apache.poi.poifs.filesystem.POIFSFileSystem;
import org.assertj.core.util.Lists;
window.addEventListener来解决让一个js事件执行多个函数
本篇文章来简单介绍一下JS作用域,以及BOM对象中的三个基础对象,分别是window对象、history对象和location对象。
一、JS作用域
1、函数嵌套作用域
//函数作用域
    var place="Beijing";  //外部定义的变量
    function outer()
    {
        var place="Chengdu";  //outer函数下的重新定义
        function inner()
        {
            var place="Guangzhou";  //inner函数下的定义
            console.log(place);
        }
        inner();
    }
    // //调用outer函数,同时会执行inner函数
    outer();
执行结果:
Guangzhou
2、函数多调用
var name="路飞";
    function bar()
    {
        console.log(name);
    }
    function func()
    {
        var name="索隆";
        return bar;
    }
    var ret=func();  //将func函数执行的返回结果赋值给ret变量,即ret将代表bar函数
    ret();  //调用ret函数,即bar函数
    //又因为bar函数的作用域在外部,与它同级的name变量值为“路飞”
执行结果:
路飞
二、window窗口
1、BOM简介
BOM(浏览器对象模型),可以对浏览器窗口进行访问和操作。使用 BOM,开发者可以移动窗口、改变状态栏中的文本以及执行其他与页面内容不直接相关的动作。使 JavaScript 有能力与浏览器“对话”。
2、window对象方法汇总
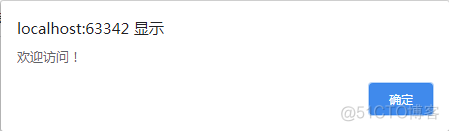
- alert() 显示带有一段消息和一个确认按钮的警告框。
window.alert("欢迎访问!");
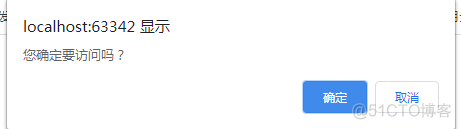
- confirm() 显示带有一段消息以及确认按钮和取消按钮的对话框。
var ret= window.confirm("您确定要访问吗?");  //由用户做出选择,因此有一个返回值
    console.log(ret);
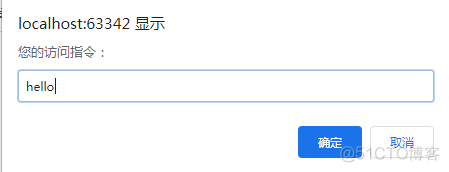
- prompt() 显示可提示用户输入的对话框。
var ret= window.prompt("您的访问指令:");  //要去用户输入内容,在控制台显示
    console.log(ret);
- open() 打开一个新的浏览器窗口或查找一个已命名的窗口。(不常用)
- close() 关闭浏览器窗口。(不常用)
- setInterval() 按照指定的周期(以毫秒计)来调用函数或计算表达式。
- clearInterval() 取消由 setInterval() 设置的 timeout。
setInterval(func,1000);  //表示每隔1000毫秒(1秒)执行一次函数func()
    function func()
    {
        console.log("Hello JavaScript!");
    }

可以看到这个地方会一直有”Hello JavaScript!”的出现。
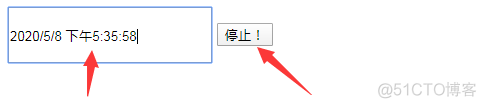
下面是由setInterval和clearInterval实现的动态时间更新小案例…
JS(<script>标签内的)代码:
showTime();
    function showTime()
    {
        var current_time=new Date().toLocaleString();  //获取当前时间并将其转化成字字符串显示
        // alert(current_time);
        var ele=document.getElementById("id1");  //获取id1这个标签的内容
        ele.value=current_time;  //将获取的id1标签的内容设置为输入框的值,实现动态更新时间
    }

    var click1
    function begin()
    {
        if(click1==undefined)  //防止多个click串行
        {
            showTime();  //实现无延迟效果
            click1= setInterval(showTime,1000);  //实现一秒更新一次时间
        }
    }

    function end()
    {
        clearInterval(click1);  //清除定时间隔
    }
外部再加两个标签:
<input type="text" id="id1" onclick="begin()">
<button onclick="end()">停止!</button>  <!--  绑定一个end函数 -->
- setTimeout() 在指定的毫秒数后调用函数或计算表达式。
- clearTimeout() 取消由 setTimeout() 方法设置的 timeout。
function func()
    {
        console.log("别点我了!");
    }
    var c= setTimeout(func,3000);  //三秒钟之后只执行一次
    //清除setTimeout 的内容
    // clearTimeout(c);
scrollTo() 把内容滚动到指定的坐标。(少用)
三、history对象
1、简介
History 对象包含用户(在浏览器窗口中)访问过的 URL。
History 对象是 window 对象的一部分,可通过 window.history 属性对其进行访问。
2、history对象的方法
- back() 加载 history 列表中的前一个 URL。
- forward() 加载 history 列表中的下一个 URL。
- go() 加载 history 列表中的某个具体页面。
3、测试代码例如:进口气动球阀页面
history1:
<!DOCTYPE html>
<html lang="en">
<head>
    <meta charset="UTF-8">
    <title>Title</title>
</head>
<body>

<a href="JS之history2.html">通往history2</a>
<button onclick="history.forward()"> >>>>>>>> </button>
<script>

</script>
</body>
</html>
history2:
<!DOCTYPE html>
<html lang="en">
<head>
    <meta charset="UTF-8">
    <title>Title</title>
</head>
<body>

<button onclick="history.back()">Back</button>
</body>
</html>
这样就可以实现一个基本的前进和返回的效果(这个其实也不太常用)
四、location对象
1、简介
Location 对象包含有关当前 URL 的信息。
Location 对象是 Window 对象的一个部分,可通过 window.location 属性来访问。
2、location下的方法
- location.assign(URL)
- location.reload()
- location.replace(newURL)//注意与assign的区别
3、测试代码
<!DOCTYPE html>
<html lang="en">
<head>
    <meta charset="UTF-8">
    <title>Title</title>
</head>
<body>
<button onclick="f()">点我!</button>

<script>
    function f1()
    {
        // location.assign("www.baidu.com");  //默认跳转的页面
        // location.reload();  //刷新当前页面
        location.replace("www.baidu.com");  //替换当前页面
        //assign可以后退,replace不行
    }
</script>
</body>
</html>
声明:本站所有文章,如无特殊说明或标注,均为本站原创发布。任何个人或组织,在未征得本站同意时,禁止复制、盗用、采集、发布本站内容到任何网站、书籍等各类媒体平台。如若本站内容侵犯了原著者的合法权益,可联系我们进行处理。